
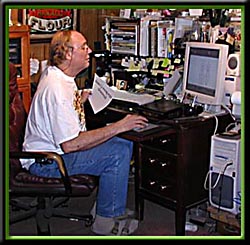
Rick Glawson
1947-2003
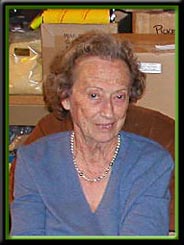
“Daddy Fine Gold”, as he was affectionaltely called, did his first paying gold leaf job for a Cadillac dealer in south Los Angeles. Many sign makers knew him through his participation in Letterheads, along with Esoteric Sign Supply—his unique version of a sign supply house. With aid and support of his best friend, Lola Grey, Rick established himself at the top of the craft.
Besides his direct involvement in the sign industry, Rick also established his name and shop as a premier restoration artist, specializing in reverse glass. The challenges involved in faithfully repairing and repainting the rare and non-replaceable glass pieces led him to rediscover long lost techniques and materials. Rick spent unprecedented hours researching the tools, tricks, and techniques of the trades. Many might think he had a degree from an engineering school, or even a degree as a chemist—but he was just Rick.
Rick was big in stature, and equally big in heart and personality. Over the past 18 years, Rick hosted the popular California Conclaves at his shop in Wilmington, CA. Most of his time was spent teaching people the techniques and new materials he had discovered.

Rick was big in stature, and equally big in heart and personality. Over the past 18 years, Rick hosted the popular California Conclaves at his shop in Wilmington, CA. Most of his time was spent teaching people the techniques and new materials he had discovered.
![]()
Related Articles and Documents by Rick Glawson
Rick Glawson’s Angel Gilding Article
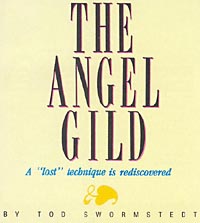
“Reprinted from the July, 1988 issue of Signs of the Times magazine” Cover shot close-up above.
 Anyone who has attempted burnished gold on glass will appreciate the discovery of “angel gilding”, a technique that presents the opportunity to consistently produce a perfect gild. The initial impact of such news should be as tremendous as the resulting gild is brilliant. The specifics of the “discovery”, coupled with the nature of the process itself, are also significant, as the following interview suggests.
The angel gilding technique is described as the chemical deposition of gold on glass, meaning that pure gold is suspended in a liquid state until it is converted back into its original form and deposited on glass through the proper addition of chemicals. Another technological advancement to threaten the signpainter? Not exactly, because there’s a twist. The technique actually dates back to over a century ago and was widely used by the sign industry at one time. The discovery, then, is more accurately a “rediscovery,” made possible by the determined efforts of a master craftsman who has made a specialty of classic glass decorating techniques.
Once the word is out, there is sure to be a debate. Some will see the news as reassurance in the legitimacy of the time honored methods of signpainting; others will consider the chemistry of angel gilding contrary to the tradition of classic gilding techniques. Readers will have to decide for themselves…
![]()
The Interview with Rick:
Q: You’ve spent the last three years researching the angel gild technique. I understand that the discovery – or better, rediscovery – was the result of a trail of clues. How did it all begin?
A: Shortly after I began restoring antique glass signs, it became apparent that an entire group of glass sign manufacturers had existed which specialized in quantity-produced, framed glass signs. Because of previous research, I was usually able to restore such signs using the original techniques and materials but one thing puzzled me about the framed glass signs, particularly those that were glue-chipped or acid-etched: From the front they looked gold but when the back-up paint was removed, I saw silver.
Q: It’s not feasible to double gild…that is use gold-leaf and back it up with silver?
A: There’s no reason at all to, unless it was a mirror, and you gilded the design and then silvered the entire background. The difference in these signs was that the silver and gold matched up exactly. I have to admit, I was thrown for a loss. For the moment, I filed it away.
It wasn’t too long after that I found the right information to enable me to do chemical silvering in my own shop. I thought to myself, “If you could do this with silver, why couldn’t you do this with gold?”
The next development happened at a Letterhead meet – A Happening Fandango – in May, 1986. A fellow signpainter, Rufus DeSoto (St. Martinville, LA), had brought a copy of HOW TO PAINT SIGNS AND SHOWCARDS, by E.C. Matthews which he thought I might want to see. Because it was Matthews, the book got my attention and I started reading through it. There, in the gilding section, was probably the most significant clue of all: a description of a “new gilding process patented by Mr. Andres of San Francisco.”
Matthews went on to give a full description of how to use a gold solution for gilding on glass. The crux of the process was that the gold was backed up with an application of silver solution for added brilliance and bulk. I now knew two things. First, why the silver was behind the gold and secondly that it is more feasible than using gold.
When I’ve seen that something has been done in the past, I know that it can be done again. The discovery gave me the incentive to continue my research.
Q: For historical perspective, what time period are we talking about?
A: The original copyright on this specific Matthews’ book is 1920, which means he was probably writing it 1917-1918. If you look back the earliest Signs of the Time – you find that the list of glass sign manufacturers. There was an entire portion of the sign industry making nothing but glass signs, a majority of which were angel gilded.
Although glass signs were widely used during the turn-of-the-century the manufacturers depended heavily on their two bread-and-butter customers – the brewing and distilling industries. Unfortunately, the market for such signs decreased once the distillers and brewers acknowledged the coming Prohibition. Without the volume, most glass sign manufacturers were forced to close their doors or shift to another industry.
It was at this time that the aforementioned Mr. Andres bought the rights to the gilding process from the glass manufacturers.
He must have had some knowledge of the mainstream sign trade because he saw the possibility of applying the technique to window lettering using a spraying method. The glass sign manufacturers had poured the solution in a horizontal fashion.
Apparently he was also wealthy because he was able to set up agencies across the country to sell what he claimed was a patented process. The response was less than overwhelming. According to the August, 1925 issue of Signs of the Times, the technique would no longer be offered to the sign trade.
Q: And that was the end of it?
A: No, because even though the technique had failed to attract the sign industry’s attention, another potential buyer surfaced – the mirroring trade. In fact, the royalties from this customer were sufficient for Andres to forget about the sign industry forever…even though he had left himself open in his 1925 announcement to reintroduce the sign trade to the process if the interest warranted.
I later found out that while he had claimed a patent in 1920, he was not officially offered it until 1934. By that time, he didn’t care enough about the gold method to respond; he had already made his fortune from the mirroring trade which was interested only in silver.
Q: Then the technique was simply lost to time until your research?
A: Essentially. I did hear from Keith Knecht about a signpainter who had traveled around a country observing various goldleaf jobs so as to improve his own work. He had made a special trip to Albuquerque to meet an old gold man who was doing angel gilding. The old gold man was self taught and unfortunately harbored bad feelings for a trade he had to learn the hard way. He was determined to take his knowledge to the grave.
Q: What happened next?
A: With the help of a few tidbits here and there, I began actively experimenting with the chemicals I thought were involved. I have a very minimal chemistry background but I think this may have helped. I didn’t have to believe what doesn’t work. I’d work with it for a couple of days straight but never with any real success.
Lee Littlewood (Lee’s Better Letters, Portland, OR) then sent me a photocopy of Andres’ patented formula that had appeared in a British book. It wasn’t enough by itself but with the other information I had gathered, I finally succeeded.
Q: You’ve mentioned several people were helpful in providing information and/or support. I’m sure there are others…
A: Everyone was encouraging and supportive, but besides those already credited, I have to thank Mike Jackson (Jackson Signs, Jackson, WY). Steve Ledford, a chemist for Delamo Chemical CO, which manufactures silvering chemicals, was very helpful in providing information and chasing down difficult-to-obtain chemicals.
Q: Signpainters are now more concerned, as they should be, with the materials they use. The mention of “chemicals” specifically is sure to prompt some questions about angel gilding.
A: There are no dangerous chemicals involved, However, if an individual feels he is more sensitive than the average person, he may want to wear a mask.
Q: Others may hesitate to use the technique because they associate it with their struggle through high school chemistry.
A: Yes, I’ve already heard the comments “I’m not a chemist and never did understand that kind of stuff. I’m just a signpainter” My response is that a signpainter is already dealing with chemistry when he lays his first gold. It may be simple to soak gelatin capsules to make a water size, and then apply little sheets of gold, but there are reasons – principles of chemistry – behind why the gold adheres to the glass. Yes, you can get into some difficult and intricate explanations but you don’t need to in order to make the chemistry work. You can achieve the results without understanding the fine points. Like the computer, it’s a tool.
Q: I understand the analogy but you may be treading on dangerous ground when you bring in the computer.
A: No, I think it’s a good analogy, because I don’t want to give the impression that angel gilding will make book gold obsolete. Angel gilding will no more replace the traditional methods of gilding that the computer will replace the signpainter.
Q: What would you say are the advantages and disadvantages of angel gilding?
A: Its advantage is also its disadvantage. The only real drawback is that it’s too brilliant. Anyone who has been using goldleaf for a number of years can tell you that the majority of the problems they have are due to the goldleaf…not the gelatin or the water, but the quality of the leaf. It’s now possible – once again, I should say – to have a perfect, mirrored gild, with no overlaps or patches.
Q. The brilliance is undeniable, but what about the factors of labor and cost?
A: The Wheel of Fortune project (see May, 1987 cover story) is a good example of the time you can save. All of the glue-chipped pieces for that job were silvered using the same spray technique that I now use in the angel gild. The time involved was five minutes, But I also did a glue-chipped set of pieces for myself in gold, and that took 45 minutes. Because the glass was glue-chipped, I had to double water-gild. As much as I love gold on glue-chipped glass, it was always pure drudgery to have to come back and surface gild behind chipped work, yet it was the only way to produce a nice job.
The saving grace for me is that the technique is nothing new. I’ve reads that the chemical deposition of gold and silver were both accomplished around 1860, so it’s been known how to deposit the solutions on glass for more than 100 years. Anyone who knows me understands what an appreciation I have for the craftsmanship evident in the antique glass signs of the turn-of-the-century.
Q: And price?
A: I’ve discovered that if the pouring method is used, the cost is equal to or a little less than, the price of goldleaf for the same amount of coverage. This doesn’t take into account the savings in time or the brilliance achieved. If the solution is sprayed, you get approximately three times the coverage. For $160 worth of chemicals – that is, all the different chemicals needed – you get 25 sq ft of coverage when spraying on glass. This translates to 15 books of gold.
Q: I understand the technique can also be used vertically – for example on an on-site storefront window.
A: Lee Littlewood has already used the silver on some window lettering jobs in Portland. Andres, himself, made a runner available to catch the run-off. In fact, he ignored the idea that you could pour it on glass in selling the concept to the sign trade. His kits included two bulb atomizers for applying the solutions.
What I have done is cut a 28 in. length of 2 sq in plastic gutter downspout and capped both ends by cementing in pieces of acrylic (the 28 in is for 30 in doors). I then tape it to the door which catches the run-off like a gutter does on a house. I do suggest using drop cloths when doing the job on-site.
The technique itself, is really no more involved or difficult than that of traditional glass gilding. I want to emphasize that it was taken off the market through no fault of its own. It isn’t dangerous and I can attest to the fact that it does work. It was simply a matter of one man controlling the product and finding greener pastures in another market.
How-to Overview
Unlike the old gold man determined to take the secrets of angel gild to his grave, Glawson intends to spread the word to all who show interest. A basic review of the technique follows, but specific instructions – mixing proportions, etc – are omitted, simply because they become meaningless without the proper ingredients on hand. The angel gild kit, however includes a detailed set of step-by-step instructions.
The chemistry of angel gilding offers a choice of two methods of application – either pouring or spraying – both of which are discussed. The first step – cleaning the glass – is critical to both methods. Glawson uses a special glass-cleaning compound that is different than the Bon-Ami usually preferred for cleaning glass.
The second step involves the mixing of various ingredients to produce five separate solutions – one each of gold and silver concentrate, a gold depositing agent, a silver reducer and a tinning agent. When all are prepared, the tinning solution is then sprayed on the sections to be gilded, allowed to set for a minute and then lightly spray-rinsed with distilled water. The remaining steps are specific to the choice of methods.
For pouring level glass, dam up the edges of the glass or isolated areas using a hot glue gun. Now pour an equal amount of the gold depositing agent into a paper cup of gold solution and then pour the mix onto the glass surface. After 30 seconds, the solution will become dark and form a film, which is lightly rinsed off with water. The procedure is then repeated using the same mix of the two silver solutions. The solution will soon turn muddy at which point it is poured off. Now rinse off the glass with water and blow-dry. The gild is ready for backing up.
Spraying on vertical glass necessitates a catch-all or drop clothes to collect run off of the somewhat caustic chemicals involved. Woodwork, for example, will darken if exposed to run-off. To begin, repeat the cleaning, tinning and rinsing off procedures described for pouring.
Using an airbrush or “Preval” sprayer, now apply a mist of the solution of mixed gold ingredients at the top of the glass so that the chemicals flow down over the intended area in a consistent manner. After rinsing, repeat the procedure with the silver solution, and rinse again. Gild is now ready for backing up.
Excess silver can be removed with cotton and Bon-Ami or with the silver stop provided in the case of the latter, spray or brush-on a solution of the stripper and water and rinse-off silver will disappear.
![]()
Cover Credits
The idea to feature an actual sample of angel gilding on this month’s cover was the spontaneous result of the interview that was the basis for this article. The design, however, belongs to Rick Glawson who is also responsible for the majority of the fabrication, including gilding and glue-chipping.
For the record, “angel gild” was first glue-chipped, then angel-gilded (including the bright line) and finally, outlined in black. The masthead is burnished angel gild, based on camera-ready art supplied by Signs of the Times.
The talents of Pat Mackle (Decorative Glass Processes, Monrovia, CA) were enlisted for the “brilliant-cut” flourishes, which are also angel gilded. For the marbled background, Glawson called upon Steve Borowitz, a specialist in aging, graining and marbling at a respected Disneyland paint shop. Using an actual marble sample for reference, Borowitz hand painted the background on a special transfer paper which was then applied to the glass with water-soluble glue.
![]()
This set of notes came from Rick Glawson’s last catalog. He listed the products and indicated some of their uses. (Thanks to Danny Barronian for typing the list for this site)
Esoteric Catalogue
COMMONWEALTH Varnish Specialty sign varnishes since 1917. NOTE: After pouring from the can, hold your breath a moment and blow into the container before sealing. This replaces the oxygen with carbon dioxide and helps prevent the gelling of the contents.
CLEAR FIBROSEAL:
This famous old product has long been a favorite with sigh artists. It takes the place of all quick drying mixing varnishes. Clear fibroseal is thin in body, flows free and dries in 30 minutes. All japan colors should contain a liberal portion of fibroseal as both the thinner and binder in order o secure the best possible resultsBLACK FIBROSEAL:
Our Clear Fibroseal and a very fine grade of carbon black produce this outstanding opaque surface coating. Add small amount to clear for an unbeatable transparent glaze.W.W. WINDOW SPAR:
A special varnish made expressly for clear coating gold work on reverse glass. Pale amber in color, it dries in 10 minutes.BULLETIN SPAR :
The same properties as W.W. yet a little heavier bodied. It’s my favorite for clearing reverse work. Use as the harding portion when mixing embossing damar for a faster set-up time on small jobs.QUICK RUBBING:
Amber in color with a 1 hour drying time. Add to damar for a longer open time or after 24 hrs. can be rubbed out for a fine finish.VENICE JAPAN GOLD SIZE:
Amber in color & very thin bodied, it flows well and gilds in an hour or less. Use as a thinner and binder like the long extinct 1-shot liqui-seal.FLORENCE JAPAN:
Used as a binder and drying varnish. Amber in color & very thin, it is self-leveling and can be gilded & engine turned in 10 minutes. This means a very short window, but great for small centers and touch-up gilding when rushed.DAMAR VARNISH:
Thick bodied liquefied damar gum for picture adhesion in reverse work and center embossing. It does not dry on its own and must be mixed with varnish to set up and dry. Mix 50/50 damar & varnish for lithe or canvas adhesion. For embossing add 50% volume of Res-n-gel to your damar/varnish mix as a thickener giving you the desired one third of each.ASPHALTUM VARNISH:
Used as a glue/acid resist & glazes.RES-N-GEL:
A synthetic resin conditioner and thickener used to give additional body to damar varnish.FROG JUICE:
Sunscreen clear 7000. An uncatalized, perfectly clear urethane which thins with mineral spirits and contains UV inhibitors. It is eve flowing and dries in about 20 minutes. It is the only clear we can recommend over exterior gold work “when necessary”. Use to clear sandcarved glass prior to paint infill to help eliminate frost. Safe for clear coating metal leaf. Poor adhesion to clear glass.ESOTERIC ARTERIAL RED:
A semi-transparent deep “rubylith” red for lining and backgrounds. Oil base and screen consistency, it is broken down with mineral spirits or turps for brush work. You can add black back-up enamel for an extremely intense dark red without the normal “brown” result. Screen print in reverse and color back blend for melted candy splits and panel blends. No other color like it, it matches period work.
NAZ-DAR TRANSPARENT SCREEN INKS:
Packaged in 37ml metal tubes, it comes in 9 colors, blue, purple, red, stop sign red, orange, medium yellow, primrose yellow, green & gold. Thin with spirits and further transparentize with clear if desired for color patches in pearl work or split shading. Quick drying, it can be retarded with gold size.SHELLAC FLAKES:
Dewaxed crystal clear, mix 2 parts “denatured” alcohol by volume to one part flakes. Comes in ruby, orange, lemon & blonde.DRAGON’S BLOOD:
An alcohol soluble red resin for tinting shellac. Alcohol soluble.GAMBOGE:
A yellow resin for tinting shellac. Alcohol soluble.MIXOL:
Concentrated universal tints in 24 colors. Soluble in oil, water or alcohol. Mix up to 10%. 20ml (.68 oz) size.
![]()
Angel Gild Instructions
The 2nd surface chemical deposition of pure gold on glass
(thanks to Larry White for typing up the instructions).
Please read through the instructions thoroughly and follow the procedure to the letter. Although not difficult, the steps and sequences set forth are important and not without reason.
All chemicals when not in use should be kept in the refrigerator or a cool dark place. Let them warm to room temperature before use if refrigerated.
You will need to obtain the following; 3 Household variety spray bottles, 1 Galion of steam distilled or demonized water, 3 One-quart size plastic seal able containers, Disposable latex gloves, An electric orbital sander or car polisher with a felt or cotton blanket pad and an electric hot glue gun for selective gilding.
CONTENTS OF THE KIT ARE AS FOLLOWS
(Bottles are marked by color)
TWO – 8oz. Bottles “PURPLE” gold solution (Pre-diluted and ready to use)
TWO – 8oz. Bottles “YELLOW” gold reducer (depositing agent) concentrated form. One bottle is an extra to ensure enough quantity to use all the gold.
ONE – 2oz. Bottle of “GREEN” concentrated silver solution
ONE – 2oz. Bottle “BLUE” concentrated silver activator
ONE – 2oz. Bottle “RED” concentrated silver reducer (depositing agent)
ONE – 1oz. Container “Stannous Chloride” (tin) with ice cream stick scoop
ONE – 1oz. Container of “3 Micron Alumina Polishing Powder”
ONE – Poly bag of Orange/Black granules “Silver Strip”
ONE – poly bag Pink powder “Cerium Oxide”
ONE – Plastic measuring cup
THREE – One pint poly solution dispensers, separately purchased with initial set-up, to be cleaned as needed and reused indefinitely
ONE –Set of instructions (The very one you’re reading right now)
PRE-MIXING INSTRUCTIONS
Put on gloves as the gold and silver chemicals will stain your skin. If your skin does become stained, household bleach will remove gold (purple) stains, and silver (brown) stains can be removed with the provided silver strip. In both cases, wash with soap and water afterwards. Maintain a clean work area and keep all chemicals away from children and animals. The varied contents are no more toxic or corrosive than household cleaning products but as such should be stored safely.
MIXING INSTRUCTIONS
GOLD SOLUTION- The “Gold” solutions (purple) are pre-diluted and READY FOR USE. Just pour into your dispenser marked “GOLD”.
GOLD REDUCER- The “Gold Reducer” comes packaged in CONCENTRATED strength and must be mixed. Pour one entire 8oz. “Yellow” bottle into the dispenser marked “GOLD REDUCER”. Now re-fill the same 8oz. Bottle with DISTILLED WATER to the previous level and pour that into the “GOLD REDUCER” dispenser. Shake it well and it’s ready for use. Remember, the second bottle is a “just in case” extra.
SILVER SOLUTIONS-
SILVER- Using the provided graduated measuring cup, fill and pour ONE OUNCE (30 ml, ml and cc are the same) of the GREEN silver concentrate from it’s 2oz. Bottle into your 1st quart bottle you obtained. Now add 32oz. of distilled water, cap it, shake well, and label it “SILVER”. Wash out the measuring cup thoroughly with tap water.
ACTIVATOR- Next, fill and pour ONE OUNCE of the BLUE silver activator into your 2nd quart bottle along with 32oz. of distilled water. Cap, shake well and label it “SILVER ACTIVATOR”. Wash out the measuring cup again as before.
REDUCER- Now fill and pour ONE OUNCE of the RED silver reducer (depositing agent) into your 3rd quart container and add 32oz. of distilled water. As before, cap and shake well and label it “SILVER REDUCER”. Rinse out your measuring cup again with tap water and put it away with the 3 silver concentrates for next time.
SILVER STRIP- Add the entire Orange/Black contents of the poly bag into one of your spray bottles along with 16oz. of regular tap water and shake. It is ready for use and has an indefinite shelf life. There is no need to refrigerate it.
TIN SOLUTION- Stannous Chloride. This is made up fresh before use as it perishes within a few hours after dilution. Mix one scoop of tin crystals (approx. ½” on the end of the provided ice cream stick) with 8oz. of distilled water in a dedicated spray bottle. Shake it well and mark as “TIN”. Always rinse out the spray bottle well before making up a new batch. When not in use, keep container tightly closed and away from strong sunlight.
CERIUM OXIDE- There is no pre-mixing required.
ALUMINA POLISHING POWDER- Add enough tap water to the container it comes in to produce a wet paste. Ready for use, indefinite shelf life.
SPRAY WATER BOTTLE- Fill with distilled water and mark it as such.
GLASS PREPARATION FOR GILDING
All commercial plate glass now manufactured is called “Float Glass”; a pre-determined amount of molten glass is poured onto a bath of molten tin, which then solidifies perfectly flat. The side of the glass facing the bath is called the “tin side”, and is invisibly contaminated with metals. In chemical deposition of metals on glass, or in firing of lusters, the upper side or “clear side” of the glass must be used. The use of a Mineral Light is used to determine the clear side over the float side. We will always want to gild on the clear side of the glass.Cleanliness is the key word here. Obviously if dirt, oil or any cleaning compound is left on the surface, it will give you an uneven and splotched gild. We first remove any oil, grease or loose dirt from the surface with Bon Ami or some dish detergent/water mix with a little cerium oxide sprinkled on for abrasion. Apply with paper towel or sponge, scrubbing, as you would wash your car. Rinse thoroughly using tap water and dry with a clean paper towel.
The next step is VERY IMPORTANT as it gives the glass surface “tooth” on which the gold adheres. Using the container of Alumina Paste, apply a dab or two onto the glass with a little tap water. The most efficient method is to use a small electric orbital (jitterbug) sander with the sandpaper replaced with a piece of felt or blanket. Adding additional water as necessary to keep a wet slurry, work over the surface for a minute or so. You could use a hand pad and a lot of elbow grease, but it’s not near as efficient as using the sander. Float glass, (which is 90% of the commercially used glass today) is manufactured with as close to an optical polish on the surface as possible. This causes difficulty in achieving good adhesion. Common cleaning abrasives including Bon Ami, Pumice, and Cerium Oxide, are softer than the glass, which has a hardness of 5 to 5.5 on the Mohs scale with 10 being diamond, the hardest. The best effort with these products only gives you clean glass. The provided Alumina powder has a hardness of 9 (same as sapphires) yet has a particulate size of 3 micron (approx. 2000 grit). It microscopically scratches the surface well beyond the naked eye. A lack of tooth will cause the gold film to lift off the glass at a certain thickness or in some cases not allow it to deposit at all. In these days of high technology it is advisable to abrade all glass prior to ornamentation. Once the surface is well abraded, rinse well with tap water and a damp paper towel and avoid touching the cleaned surface.
DAM BUILDING FOR SELECTIVE GILDING
The best device we have found is a common hot glue gun. The tan or yellow colored glue sticks have better adhesion than the clear or white ones. In either case don’t skimp on the bead around the area to be gilded. Later on if you find a smaller gun to be insufficient, an industrial version is available from the 3M Company. Squeeze an even ¼” wide bead around the glass perimeter or if the gilding is limited to a selective area, approx. 1” away from that portion. If the project must be gilded completely from edge to edge, as in a beveled or nipped edge piece, eliminate the dam but make sure the edges of the glass are clean and oil free.NOTE: From this point on, any time you rinse your glass, you may use regular tap water as long as you finish it off with distilled to eliminate any tap water contamination. This will save on your distilled water cost.
TINNING
Take your “distilled water” spray bottle and thoroughly wet the prepared glass. Hold it up vertically and shake off the excess water. Now using the “Tin” spray bottle, apply a wet coat over the glass. If you observe any repelling of the tin, saturate a piece of clean cotton with the tin and swab over that area. Be careful not to touch the surface with your fingertips. Let the tin sit for a minute or so then rinse, first thoroughly with tap water followed by a rinse of distilled water. Allow a pool of water to remain on the surface of the glass until you are ready to pour on the gold. DO NOT allow the surface of the glass to dry.NOTE: A good working area for gilding is a plastic tub with several strips of wood laid across the top to level your glass on. It is not environmentally or legally permitted to pour gold or silver chemicals into the city sewer. Save all chemical runoff in your gilding tub and allow them to evaporate there. Saving the evaporated sludge in a separate container takes up little space and can at a later date be turned into a refiner that will extract the precious metal for a fee.
GILDING
NOTE: For each square foot of area to be gilded, a minimum of 10 milliliters (ml) each of gold and gold reducer is required. I personally tend to go over kill because the additional cost is minimal compared to the labor and material cost of regular leaf gilding. The extra poly dispenser marked “Distilled Water” is for the accurate dispensing of additional water to the Gold on larger panels. To increase the amount of liquid for panels of 10 or more square feet, you can safely add 50 to 100% additional water to your gold/reducer mix. This will retard the deposition time, but will give you the needed volume to keep the surface submerged.For our example we will gild an area of one square foot. Squeeze up 10 ml of Gold solution from the dispenser and pour it into a plastic cup. Now squeeze up 10 ml of Gold Reducer and pour into a separate cup. Always keep these cups rinsed clean between uses and never allow the same cup to be used for Gold and Silver. If when dispensing and pouring chemicals into a cup you find the solution turning black, a mix up has occurred. Don’t argue with yourself, throw it out and grab a new cup. It happens to us all from time to time. Go back to your wet panel and shake off the excess water. Now take your two cups and rapidly pour one into the other and back again. ALWAYS pour the Reducer into the Gold, not vice versa. Box these together 3 or 4 times then quickly pour the mixed solution onto the glass surface. On panels of approx. 4 Sq.Ft. or larger, it’s advised to mix the two chemicals by swirling the Gold around in the one cup and rapidly pour the Reducer into it. I generally pour around the perimeter first, then towards the center. Gently rock the panel from left to right and front to back making sure the panel is fully covered with the liquid. Being transparent, it is hard to maintain visual coverage without the rocking and is quickly apparent if you have sufficient solution. If not, quickly add some more. Being confident your panel is well saturated and level, let it set quietly for deposition, only occasionally rocking it to assure even coverage. Depending on the temperature and the humidity, the deposition time can be anywhere from a few minutes to a half hour or so. The process LOVES hot surroundings. Shop temperatures of 80 degrees and above make for glorious gilding sessions.
You will at first see a darkish film develop, where light can still pass through it. As it further deposits, and starts to reflect light, it takes on a golden copperish appearance. The coating is sufficient when you can only barely see your hand when placed underneath the panel. If there is any lifting of the gold, the cause is poor original cleaning or lack of surface abrasion. Pour off the spent solution and rinse the panel thoroughly with tap water, front and back. Follow this rinse with distilled water to swill off the tap and place it back in your tub.
SILVER BACKING
The Gold layer at this point is very delicate and translucent, and may appear to have dark areas. These are usually thinner deposited spots and you are seeing the darkness of the tub shining through. We apply a layer of silver behind it to give it a little more durability, opacity, and brightness.For each square foot of area to be silvered (calculated from the previous gilding step), use one ounce (30ml) each of the 3 diluted silvering chemicals (Silver, Silver Activator, & Silver Reducer). Measure them out separately and pour into marked plastic cups. Now pour them together into a larger cup, swill around, and flow onto the gilded panel as you did the gold. The mixed silver solution is nowhere near as trigger happy as the gold, so you have plenty of time for application. It is best to have all the chemicals measured out and ready to mix so you can make a smooth transition from your cleaned and tinned glass to completion. If any portion of the gild has started to dry, mist on some distilled water and shake off before applying the silver.
It takes much less time for the silver to react, usually a minute or so. It is not necessary to apply a solid silver layer. Approx. 50/50 in color or a pale gold in appearance is sufficient. If the silver layer appears dark and discolored, poor rinsing is the cause. Normally this doesn’t effect how it looks from the front, but in the case that it does, spray it with your silver strip, rinse it well and resilver. The silver strip will not affect the gold. When you approve of the silver layer, pour it off, carefully remove the glue dam (if used), and rise thoroughly with tap/distilled water. Now you can either stand it up on edge to drip dry, or blow-dry it for speed. Don’t let it lay flat when drying as the water puddles, when dry, could show through to the front. When it is dry and shiny, it’s ready to back-up. The metal surface is just as tender as water-gilded leaf, so avoid any conditions that would scratch it.
BACK-UP & REMOVAL:
The surface can now be backed up in the same manner as regular window work. You may silkscreen or pounce and letter the graphics by hand. If this is to be a solid mirror, coat the back with a good enamel or asphaltum. For signage and ornamentation, use an approved back-up paint such as “Fine Gold’s” as the excess metal must be removed safely.We have found that a bit of “Splash” surfactant with a lightly water moistened cotton pad used alternately with a dry pad will remove most of the excess. If the silver was applied heavy and is being stubborn, a little silver strip will aid. As with cleaning up regular leaf work, don’t over saturate with moisture. Think elbow grease primarily. When only a slight “halo” remains, a touch of Bon Ami on your pad will finish it off.
![]()
Black Glass
Rick Glawson’s Guide to Black Glass
(thanks to Larry White for typing up the instructions)
LEAD NITRATE DEPOSITION (Caution: many chemicals may be dangerous. Read all instructions and safety information supplied by manufacturers)
The deposition of lead on glass is just as easy, if not simpler, than standard silver mirroring. Because of its darkened appearance, any otherwise noticeable blemishes are hard to distinguish.
These instructions are for those persons already versed in normal silvering procedures and taking for granted you are set up to produce standard mirrors.
CONTENTS OF SET AND MIXING FORMULA
The three parts of this set are as follows:
THIOUREA; 60 gm to be mixed and shaken well with one quart of distilled water.
SODIUM HYDROXIDE; 120 gm to be mixed and shaken well with one quart of distilled water.
LEAD NITRATE; 40 gm to be mixed and shaken well with one quart distilled water.
As you have noticed this is much like setting up silvering chemicals with the only difference being the use of dry concentrates. They will dissolve rapidly with distilled water and occasional shaking. The shelf life is indefinite.
Clean and tin your glass as normal. Now take a small portion of your diluted “GREEN” silvering solution as a sensitizer, pour onto your panel, swill around and let it sit for a minute or so. This not only helps in deposition, but also gives a slight blue cast to your mirror.
Rinse thoroughly and apply your lead solution made up of one ounce of each of the three counterparts for each square foot of glass. The deposition time is a little slower than silver but will be noticeable in a few minutes.
As an example: A one square foot panel would require one ounce each of diluted Lead Nitrate, Thiourea and Sodium Hydroxide. No particular order or caution is necessary in mixing. Simple boxing and application will suffice.
After an acceptable layer has developed, rinse well and treat as a normal mirror. Unwanted deposits may be removed after backup with silver strip or muriatic acid.
![]()
Acid Etching
HYDROFLUORIC ACID / MICA GLASS EMBOSSING PROCESS
By Rick Glawson (Thanks to Larry White for typing the instructions for this site)
This process causes a deep stippled emboss to glass (not the light frosted effect associated with hydrofluoric creams). This treatment has been used well over 100 years in England and in this country, where it is practiced to this day.
A NOTE OF WARNING: HYDROFLUORIC ACID DOES NOT INSTANTLY BURN AS OTHER CORROSIVES, BUT IT IS ABSORBED THROUGH THE SKIN AND ATTACKS THE BONE. IT WILL DILUTE THOROUGHLY WITH WATER SO WEAR GLOVES AND WASH UP AFTER EACH USAGE. THIS ACID CORRODES ONLY GLASS, SO KEEP YOUR DILUTED MIX IN PLASTIC CONTAINERS. READ AND FOLLOW SAFETY INFORMATION AND DOCUMENTATION SUPPLIED BY THE MANUFACTURERS.
PREPARING THE ACID MIX- You may buy the hydrofluoric acid in 1 pt. Bottles at Del Amo Chemical. It comes 48 to 52% pure and must be diluted to approx. 20% for usage. Mix in a plastic bottle, 2 parts acid to 3 parts distilled water and stir. As a safety factor you may use blue food coloring instead of the distilled water.PREPARING THE GLASS- A vinyl resist is placed on the glass. (Scotchcal #3470 material is perfect, or any peelable vinyl film that leaves no residue). Proceed with cutting out the artwork or design. Leave the image to be etched in vinyl on the glass. Coat the vinyl and the glass with asphaltum varnish and let dry.(approx 10 min.). Weed out the vinyl mask in the design that will be etched. Protect the back side of the glass from acid vapors, which will fog the glass, with protective contact paper, vinyl, or a coat of asphaltum varnish. You may at this point add in any additional flourishes or scroll working the open areas with a brush and asphaltum, allow to dry.
Choose the degree of stipple desired. A fine mica will produce a fine “hammered’ effect. Make a paste by mixing the mica (wet, but not runny) with your diluted acid in a plastic cup. Level the work piece in a well ventilated area and apply the paste evenly over the exposed areas. A wooden paint stick works fine.
The acid does not corrode the mica and in turn, the mica interrupts the action of the acid on the glass causing the a constant stipple. Allow the acid ½ hour on the glass. Remove the paste with the same application stick and put it back into your mica pot, being careful not to rub the fresh etched surface. The mica can be used repeatedly only refreshing with new acid. Rinse thoroughly under water. Remove asphaltum with thinner. Gild or silver as usual.
![]()
Abalone
Rick Glawson’s Guide to Laying Abalone
(thanks to Larry White for typing up the instructions)
The shell available in the past was for the most part small, thick, and crudely ground flat on one side. They were randomly placed in letter centers or backgrounds with damar and quick rubbing varnish, then the gaps filled in with various material, the most common being crushed pearl, gold glitter, or diamond dust, also wrinkled or embossed tin foil was widely used, more to fill gaps than for reflection. The shell’s greatest effect is from light reflecting off the face. Light passing or reflected through the shell gives a neutral or lightly opalescent look but does nothing to enhance its iridescence. The availability these days is limited to thick material (approx. 60 thousandths, compared to our 8 to 10 thousandths) for musical instrument inlay when and if you can find it. Hence was our incentive to produce our own supplies and progressively for other sign artists.
To form the shape desired, score the face with an x-acto knife with or without a straight edge, then snap it in half between thumbs and forefingers (with score upwards) to separate. Small pliers may be used for curves and to nibble off narrow edges, much the same as cutting glass or thin plastics. A carbide wheel glasscutter may also be used for curves or for where a knife blade wants to follow the grain of the shell. For tight seamed mosaic, clean up edge lightly with a small fine file. I prefer to entirely finish the work, saving only clear portions for the shell and the final protective coat.
To do a letter fill, with the work laying flat on the bench, mix up some damar and rubbing varnish (as for an embossed center) apply liberally to both sign and pearl face, randomly laying pieces (approx. ½” square on a 3” high letter) one at a time and partially covering letter outline with about 1/16” to 1/8” gaps between pieces. Lightly press with finger to force out any bubbles, then sprinkle seams with “fill” material. Let dry overnight or until pieces are set. Clear coat over the entire job as you normally would and after it sets up use back-up color to clean up any ragged letter outlines. If foil is desired, after pearl is set, re-varnish heavy over the back and press in foil to cover entire inlay. I have normally found foil back up only where the work was to be framed and the rear obscured. Two notes- be sure to let the clear over the pearl completely dry before cutting in with back-up, and prior to setting in shell, check each piece by rotating for optimum iridescence.
For vertical work, let the varnish on both faces flash off so as not to slide when affixed to the glass. Smaller areas without fill such as bullets are better suited for varnish affixing. In vertical work, I successfully use an industrial grade instant “cyanoacrylate” glue (an optically clear, no fogging formula which we carry in stock.) This adhesive allows you to fill large areas of center, 25 sq.in. or so per letter without sliding and and tightly fitting them together in a mosaic style without open seams. Runs with this material do not immediately lift surrounding japans and take roughly an hour to evaporate when left open to the air. I lightly wipe runs over the back-up, but not over areas to be inlayed. I set the abalone using a 6” length of dowelling with a lightly rubbed tip of double sided tape, dry fitting first with each piece, then applying adhesive to to pearl face only, shaking off excess and lightly placing pearl in place only as far as to force out bubbles then separate from dowel. Do not press too hard or air may be sucked back under shell, in which case force bubbles back out and flood glue at edge to draw back into air pockets. Do not attempt to remove piece if it has come in contact with gold, paint, or back-up. When finished back and clean up as before. If down the line, the job must be removed, a sharp razor blade poses no problem. Personal experience will dictate your favorite methods, but I recommend testing a few pieces on plain glass to be sure of inlay procedures.
![]()
Osmalto (Smalts) by Rick Glawson
(Note from Mike Jackson: Rick wrote several documents—some of which were printed in Signs of the Times Magazine over the years. This document was forwarded to me from John Jordan, but I have no knowledge of it being printed in the magazine)
OSMALTO
A background with history worth repeatingOsmalto, or smalt for short, has a technical definition of being crushed or powdered glass enamel, primarily blue and has its roots in the jewelry trade. In cloisonné work, it was applied to surface designs sectioned off by thin strips of metal and fired in a kiln until melted. You often see small trinket boxes decorated in this manner.
The popular use in our trade began in the mid 1870’s, coinciding with the birth of carved wooden letters. For maximum durability and visibility, these letters were without doubt gold leafed, and projected their own elegance.
Requiring a worthy background, it helps to understand the nature and practice of sign construction during this era. Plywood wasn’t yet invented so if the customer desired a mid-ranged sign, you nailed up a wooden framework and covered it with a tin face. This gave you a smooth working surface and required a minimum of effort. For the highest quality and weather resistance of sign boards, wooden planks were dowelled together and to prevent any seams or cracks from ever showing, duck canvas was varnish affixed to the face. After initial sealing and priming, it would be wasted effort to build up its rough texture and if accomplished, wouldn’t appear any nicer than its cheaper tin covered counterpart. There was considerable cost involved in hand carved and gilded letters, so longevity was the main factor. The use of colored glass smalt was a natural conclusion. It not only disguised the rough canvas with minimum effort, it imparted an elegant glassy texture with durability and fade resistance bar none. I have seen existing exterior examples on the east coast still attractive after a century of use. Longevity aside, it’s a simple solution to the coarse or boring. The era of beautifully grained sandblasted wood signs seems to be giving way to prismatic letter faced, computer routed urethane panels with perfectly smooth backgrounds just screaming for attention.
Smalt is divided into two categories, glass and sand. The latter is simply the beach variety traditionally coated with japan colors (see Atkinson’s Sign Painting or Gold Leaf Techniques, 4th Edition.) It has a nice dull to satin sheen to it but because of its paint finish, is best reserved for interior use. Although not readily available in its original supplied form, there is an extremely durable epoxy coated version manufactured by the Clifford W. Estes Co. of Lyndhurst, NJ (an original maker of smalts in the last century) referred to as masonry aggregate and available in many colors.
The most commonly used is glass, for its shiny appearance and light fastness in exterior use. The most widely used is of coffee ground size and comes in a range of colors from jet black and ruby red to cobalt blue and dark green. Being most always used with gilded graphics, the darkest colors are preferred for maximum contrast.
In order to attach the smalts to a surface a SMALT PAINT is required. Although many materials have been used in recent years with varied results, keep in mind that merely sticking them to the surface will give you bald spots with just short service. They must sink into the adhesive a third to one half of their thickness to be permanently adhered. There is also the matter of open time when dealing with larger signs. The original recipe was to take keg white lead (which was of paste thickness), break it down with additional linseed oil to a brushing consistency and add some color to it to closely match the smalt.
In keeping with its character, our modern method is to use a half and half mix of (1) a lettering enamel matching the smalt (black with black, brilliant blue with cobalt, etc) and (2) a conditioning cream made for bulletin board pictorial work. Smith’s Cream by Dana, Jack’s Cream by Ronan and Jones Cream by Akzo are the brands available. Mixing the enamel & cream together 50/50 will give you the viscosity needed to fix the smalt, and the open time sufficient to easily do a twenty foot sign with its drying time just overnight. Some craftsmen use a product called Hol-Fast oil or epoxies for small areas but I’m assured the open time is minimal.
For application, first prepare a smalting can by taking a coffee container and perforating the bottom overall with 1/8” holes using and awl or hammer and nail. Cover the bottom with a piece of pasteboard and fill the can. When the board is removed you are able to evenly shake and distribute the smalt evenly. This type of background isn’t limited to raised letters or routed recesses but is just as handsome with flat surface gilded inscriptions. Lay your panel flat on a horizontal bench or saw horses. With recessed or flat gilded work apply the paint thickly, brushing from dry to wet where you can until evenly covered. On larger or very long panels you can paint in a certain distance, say a third of the area or so, apply the smalt heavily and evenly within 8 or 10 inches of the wet end and continue with the paint where you left off. Your own judgment will dictate how much you do at once. As a rough rule of thumb, one pound of smalt will cover two square feet of area. You needn’t wait until you’ve completely covered the sign with smalt before you dump off the excess. If you’re running short of the cheaper material (black glass or sand) or using the much more expensive colored glass, periodically flip the panel over rapidly with a tarp on the floor. This catches the excess which you reuse.
(Thanks to John Jordan for supplying this document to this site, and also to Kimberly Zanetti for retyping the old document for use here!)
![]()
Decalomaniac
This set of notes was compiled by Lee Littlewood, following the 2001 Conclave. Rick Glawson gave a seminar on creating gum decals. Special thanks to Lee for capturing some of Rick’s knowledge, and then again for sharing it with us here! MJ
Decalomania [from French, décalcomanie]: Art or process of transferring designs from specially prepared paper to china, glass, marble, etc., and permanently fixing them thereto.
These are notes from a demonstration by Rick Glawson on Feb.11, 2001 at his shop in Wilmington California. Total time was about 2 hours, so this is a condensed version with much good stuff left out. Comments in italic are Lee’s. Lee Littlewood, October 2001.
The introduction was a bit of history: back in the 1300s art teachers used transfers in “instant art” workshops for the gentry. They would print a mezzotint in black ink on stiff paper, then varnish over the ink side and smooth it to the back of glass and let dry. (The dimensions were severely limited by the small size of available flat glass.) Once the varnish was dry, they would dampen the paper with water and rub the paper off until just the ink layer was still visible, then let the water dry and varnish over the image. Now the student could paint areas of color behind the black-lined images and have an “instant painting” when seen from the front. Sounds like a good way to pay the rent for ye olde itinerant painter.
In 1800 a new method of printing was invented. Lithographers draw on a smooth stone with a grease crayon and then etch the exposed stone with an acid. To print, they dampen the stone with water and roll oil colors over it – the oily ink is repelled by the water and only sticks to the oily, crayon image. Press a sheet of paper against the stone and a very detailed print can be ‘pulled.’ A problem that arose was that the paper buckled from the moisture. One way to combat that was to coat the paper with something that would slow the water absorption (‘sizing’ the paper). One material that works is a very thin layer of glue, which in those days was hide glue, made from boiling animal hides and bones. [As an aside, the hide glue that some signmakers use for gluechipping is available today because it is used in vast quantities by the paper industry for sizing paper.]
The next step came by using paper coated with an extra-heavy size layer, printing on the size with oil colors, and thus create an image that can be transferred off the paper by redissolving the glue layer. By the 1880s “decal transfers” were a real business. Rick sells a copy of the Palm Brothers catalog which lists one decal for the side of omnibuses that was 14” x 92” (it came in 6 pieces). Many of the old decals were made using gold leaf or (better, brighter) tinted aluminum leaf, so the colors actually glow in the light – look at old safes and sewing machines. Your basic pinstriped, Kandy Kolor treadle sewing machine. Depending on which way it was printed, a decal could be varnish-transferred to the back of glass or adhered over an opaque surface. They were very useful for images on non-flat surfaces which are hard to print on – rounded tops of cracker tins, curved glass beer signs. They were and are used to apply decorations to ceramic plates and cups – paper and glue would burn off in the kiln and the special inks would fuse with the outer glaze, making a very durable but finely detailed decoration.
By the 1950s things had gone downhill; “Very degenerate” says Rick. Decals were made with a clear overprinted layer which held them together when they were floated off the paper. This explains why people always say,“Where’d you get the decals?” while you’re overvarnishing some window lettering. And I’m sure I’m not the only one who spent hours floating little “United States Air Force” decals onto my plastic model planes. So when we think back to “The Old Decals” we are only remembering one type of transfer, and it gets in the way of imagining what the earlier users were familiar with. Rick says: “Remember the technology they had available – it was all about oil & water.”
««« »»»
The mechanics of the original, varnish decal transfer are pretty straightforward – it’s all about oil and water. The paper usually has two layers – a thin, tough paper like drafting vellum laminated to something soft and felty, like coffee filter paper. (“Duplex” paper has two layers, but “Simplex” does too. Somebody probably makes a one-layer decal paper with a name like ‘Noplex’.) The thin paper layer is covered with some sort of gelatin/gum arabic/hide glue layer which is dry to the touch but can dissolve with water. On this is printed a design in oil colors (usually a screen printed lacquer ink), with or without a layer of clear overprinted over the whole design. The decal paper itself will keep the design’s parts in register (like vinyl transfer tape) while some oil-based adhesive sticks the design to a surface. Once the design is adhered, the decal paper is removed by getting it wet and dissolving the water-soluble glue layer, then sliding the paper off the design, which remains stuck to the surface.
Decals can be printed ‘forward’, so they can go directly onto an opaque surface or ‘reversed’ so they can go behind clear glass. It is possible to translate a ‘forward’ decal to ‘reversed’ by sticking it to a clean piece of decal paper and then removing the original decal paper. To do this, work up a slurry of adhesive from the decal paper around the design and smoosh it over the face of the image. Now stick it to a new piece of decal paper, adhesive sides touching, and put it under a book to dry flat. When dry, moisten the original paper from behind and remove it, leaving the image stuck to the new paper but flipped over.
««« »»»
So, now to do one. First we screenprinted the American Sign Museum logo in black ink on duplex decal paper. As it happened, the image had been set up for glass – it was reading right-to-left, not the usual direction, so a transfer to glass was easy: 1) cut the paper roughly to proper size, 2) with a small sponge and a little water, rub up a slurry of adhesive from the paper and cover the image with slurry, 3) press the image onto a piece of glass and squeegee out most of the air bubbles, 4) let dry. When dry 5) moisten the back of the decal paper and roll off the top layer of soft, felty paper – it actually came off in one sheet, pretty easy. 6) Now you can see the ink through the thin but tough second layer of paper – pop any air bubbles or rewet and use a brayer (but then it has to dry again). 7) Moisten the thin paper carefully and, 8) strip it off, leaving the ink stuck to the glass. Surprisingly, you could 9) wipe off the smears of adhesive around and in the image with a wet foam brush and paper towel quite easily – the ink kept moisture from going under it. Now you’re in the position of a backed-up gold leaf job – the lines are on and edges are clean, but if any water runs over the image the adhesive will redissolve and the lines will scoot around.. So, as with a gold leaf job, 10) go over the ink lines with varnish or color to protect them from the dreaded window-washer.
We didn’t do a forward transfer but we talked through it. In this case the image is printed with the highlights first and the base color last, so you can’t see much of the image. So, 1) using a light table or holding it up to the light where you can see its shape, mark some reference marks on the front and make some corresponding marks on the substrate. 2) Varnish (quicksize is good) either the substrate or the decal and let it tack up. 3) Roll the decal into place and squeegee bubbles out. 4) Not waiting for the varnish to dry, wet the paper and remove it, 5) wet the inner paper and remove it. Now, 6) you can pop any bubbles still remaining and, 7) wipe off the varnish smears with whatever – the old books say kerosene or gasoline. The decal doesn’t need a varnish to protect it from moisture, but it will make it more durable – remember to sponge off any water adhesive still on the decal’s face before overvarnishing.
««« »»»
Some random bits of information that Rick generated during the demo:
- Decal lacquer doesn’t wrinkle in water; neither does Krylon spray clear. Unfortunately, NazDar has discontinued all the colors in the DL series, keeping only the DL111Black, DL112White, and DL110Clear. They say their all-in-one 7200 lacquer ink series, “Works as well but is not as flexible as the DL series was, needs to be sandwiched between clears.”
- NazDar makes a printable decal adhesive, waterbased (#2040). You can mix up a ‘slurry’ adhesive with 1 part decal adhesive & 4 parts water, keep in a squirt bottle.
- For a printable gold leaf size, mix NazDar PX textile ink (use the gold color) with up to 40% LeFranc & Bourgeois slow size.
- White glue (Elmer’s, …) can be used as the waterbase adhesive on old, dried decals. Matte medium is not as good.
- For good artwork, draw on satin airbrush frisket with a felt pen. This is probably as good as it gets for tracing from an original without damaging it – frisket has a mild, repositionable adhesive.
- For a two-tone gold job with a marble background in only two trips: Watergild and screenprint bright lines on the job. At the shop, faux marble a piece of decal paper with oil colors. Pick the area of marble you like and print the matte centers with bronze powder ink; heck, maybe print the outline and shade too. At the job, varnish the image area, adhere the ‘marble’ over the bright lines, remove the decal paper and extra marble with water, varnish the outer edges and scram.
- Yes, you can run decal paper through a copier. Rick showed a cornerpiece from an old safe he had traced, then copied onto decal paper and painted over the black lines with the required color combination in 1Shot. Mailed the piece to the client. If you spray Krylon clear or shellac to seal the glue you can run decal paper through an inkjet copier, but the result may have fugitive colors.
- Many tin signs were decalled and then clearcoated with shellac.
- When others will be applying the decal, give it extra toughness. Rick had a little decal from a coin-operated machine which said “Drop Coin Here” with a pointing hand, all in gold with black outline. So he printed a clear ‘bubble’contour, then sized and gilded, then black outlines and another bubble of clear over all. The trick was keeping the bubble outlines very close to the art, so it didn’t look like a 1950’s decal.
- In some old signs you find “half and half” leaf – one side is gold and the other side is silver. It was fractionally cheaper than all gold.
- Convex glass signs. You can find registration marks etched into the glass, so they probably printed them as Rick does now, in a number of passes, with a loose screen and a curved squeegee. For one beer sign, Rick did artwork of a moose in pen and ink, screenprinted it on decal paper, and after the gold and colors were in he transferred it to the glass – even though it was big the paper was flexible enough to conform to the curved glass.
- The problem with cutting extremely small letters on a vinyl cutter is not the machine or the blade, it is that the cut vinyl won’t stay on the release paper. If you peel the vinyl and apply it to the shiny glue side of decal paper it will hold tightly. Now run through your plotter and cut even extremely small shapes. Weed and apply transfer tape as usual, then damp the decal paper to slide it off the cut vinyl. Rinse the gelatin off the vinyl’s adhesive before applying. [This was in reference to cutting small shapes out of vinyl to use as a sandblast resist for mother-of-pearl monograms. To continue with that job: after you have masked and sandblasted out your tiny shell monograms, xerox the design on the paper side of some duplex paper, then tape down on a light table glue-side-up. Now you can see the design, so damp the glue and transfer the teeny pieces of shell with a tweezer till you have the monogram reassembled. The xerox on the paper shows the orientation when you apply it to a tacky surface, and the duplex paper will come off with water. Talk about a convoluted concept…]
- “Old techniques generally had a soft edge.”
©LEE’S BETTER LETTERS
2379 SE 46th Ave. Portland, OR 97215
V: 503 232-1448 F: 503 232-5615
E: LBL@EUROPA.COM
![]()
Shellac
BUG SWEAT OR TEARS – A Treatise on Shellac
By Rick Glawson
What do certain popular candies, floor finishes and auto mechanics have in common? Or more to the point, what do they have to do with our trade? In an age where we are always looking for some new high-tech material to make our work easier, or to prevent the inevitable blotch that spoils the perfect job, we have overlooked a most basic material. SHELLAC.
Produced in India by the Laccifer lacca, or lac bug, this material oozes as sweat from their bodies as they feed on sap from several species of local trees. Deposited on limbs and twigs as crust, it is collected, rendered down and shipped world wide for further refining and production into a usable state.
Soluble only in denatured alcohol (denatured meaning a change in it’s nature by adding a poison to ethyl (grain) alcohol to free it from federal taxes), it remains not only reversible, but adheres to most any material or paint. Equally, most any paint adheres to it whether oil or water based. It dries in less than half an hour and with the exception of exterior use, makes a hard, clear elastic top coating. Floor and furniture finishers can attest to this. Auto mechanics use it as a gasket sealer, and house painters use it to block out mildew stains.
Sign painters at and before the turn of the century were also known for their graining and decorating talents. For this reason they also had under their belt a greater range of use and understanding of the materials at hand. Shellac remains today one of the few store shelf items unharmed by technology.
There are two distinct class or grades of the material that we shall call commercial and “mix-it-yourself”. For most uses the “commercial variety is adequate. It has a cloudy appearance in the can because of residual waxes yet becomes clear upon drying. You will find this grade under the BULLS EYE brand name manufactured by the Wm. Zinsser & Co. of Somerset, New Jersey, and is packaged in quarts and spray cans. The higher-grade dewaxed versions (available at gilding suppliers) come in several transparent colors (blonde, lemon, orange or ruby) and come packaged in dry flakes. These you mix yourself, normally two parts alcohol to one part shellac, adjusting as desired. Do your mixing and storing in glass jars and with the commercial grades once opened, store in a glass container or the material left in its metal can will turn dark. Remember all clean up is done with alcohol whether wet or fully hardened.
When blocking out an existing panel, shellac over any red painted graphics or lettering. Acting as a barrier, it will prevent any bleed through of the original red.
Shellac also acts as a moisture barrier and has traditionally been used as a mirror backing. Even with our modern mirror back up paints, it is a safe practice to coat resilvered or new panels with a layer of shellac prior to the cosmetic black one. In this same respect, use shellac to seal any type of carved or sandblasted stone or wood before applying you gold size. This will prevent any moisture within the material from pushing off the gild. It will not only seal the porosity, but by adding a universal tint or dry bronze, you can have any base color you desire. As an example, mix in aluminum powder to undercoat palladium, pale bronze with deep gold, etc. Following this train of thought, the same metallic shellac is excellent for backing matte centers on window work. Drying quickly, it allows you to cosmetically finish up your work without fear of your black breaking through the matte or having to wait for metallic lettering enamel to dry. It will also hide any small holidays or thin spots in the leaf caused either by manufacturing, human error, or aggressive pattern burnishing.
Worthy of note is the ability of a shellacked surface to repel low pressure sandblasting. Reusable stencils made from shellacked Manila paper was once commonplace as well as saturated cotton lace. The latter can be quickly adhered to the glass with asphaltum varnish and lightly blasted for highly decorative effects, but that’s another story. Old timers may remember shellacking paper stencils and ironing them on to a silkscreen frame for printing quickie signs.
A recent practice with antiquated roots adopted in our shop involves spraying a thin coat of Bulls Eye as a fixative on the reverse of hanging glass signs after all shading, outlining, etc. has been done, and before the final background is applied. If you have ever had what you thought was fully cured, painted filigree start to soften and move around under a half marbled surface, you can understand this simple step. Another advantage is when drilling holes after completion (as is our practice); the exiting breakout caused by the drill is kept to a bare minimum. So strong is a shellac film, that if sprayed fairly heavy on one side of clean plate glass before edge scalloping, the fulcrum point of the glass nipper will be shoved clean through the glass without effecting the edge. There is no value in this result other than to illustrate a point.
In our production of period style glass signage, we often set flat backed glass jewels and abalone shell into letter centers and ornaments having burnished gold outlines. As these embellishments are applied last, their openings must be kept open. If a solid color background is required, it’s then no chore to simply fill in around these spaces. When more imaginative backgrounds are desired, so are the necessary steps. After all color shading and line work are applied and dry, spray on a light shellac coating as mentioned before. Now with a brush apply two or three coats of liquid latex frisket (available at art stores) over the areas to be protected, letting each coat dry before the next. This allows unobstructed oil based paint blending, marbling, etc. to be completed. When dry, prick an opening in the frisket with an x-acto knife and with your finger rub off the remaining film. Using a pad of paper towel lightly saturated with alcohol, clean out the shellac residue. It will have become clouded during the masking step but protected the gilding underneath. Without the shellac layer, you will lose at least some of your bright lines during the rubbing out process. Only the shellac, being soluble in alcohol is affected.
Although the commercial grade of shellac is sufficiently clear for the previous techniques, I would advise mixing your own for the following. As earlier stated, the grade of flakes used is dewaxed, giving a distinct clarity. In much of our work where abalone shell and mother of pearl is used, often as building or object backgrounds, the iridescent yet paler varieties leave room for artistic endeavors. This is where glazes come in, and most rich of all is (say it with me) shellac. Well-mixed ruby flakes impart a deep golden yellow color much improved over the cloudiness of transparent screen inks. By adding aniline dye into a blonde mixture, you can achieve any color in the rainbow. The dyes drawback is retaining its color in direct sunlight, but is rewarding for most interior use. A source of the liquid form that’s both user friendly and obtainable is Dr. Ph. Martin’s radiant concentrated water color, found at most art stores. It will quickly intermix with your shellac and straining is unnecessary. You will equally find this glaze appealing either under or surface applied over with gold leaf.
We have also found that by mixing the blonde in a heavy solution, say one to one ratio, a wonderful adhesive for attaching glass jewels is achieved. It takes two to three days for them to completely set but the wait is worth it. One note when mixing fresh shellac, don’t expect the flakes to dissolve overnight. It can take several days with periodic shaking to complete the task, so plan ahead.
The next time you face the above-mentioned situations, give shellac a chance. It deserves it. By the way, if you wondered about the initial reference to certain popular candies, you may now have a clue as to why they don’t melt in your hands.
![]()
RICK GLAWSON EULOGY
as delivered by Raymond Chapman
Frederick Elvin Glawson
Wilmington, California
October 7, 1947 – March 10, 2003
55 Years, 5 Months, 3 Days
We are here this morning to celebrate the life of Rick Glawson. Son. Brother. Friend. “Brother of the Brush”. Mentor. And for Lola, a special “son”.
It is a sad occasion because one so dear is no longer with us, but it is not a mournful sorrow that we experience because of the assurance that Rick still lives, only in a different setting.
Today is St.Patrick’s Day. It is altogether fitting that we should gather this morning as a family to honor our patron saint.
Rick was a giant man with a gentle heart. He towered over many of us, both physically and professionally, but that Teddy Bear personality never made us feel uncomfortable or threatened. When asked his height he would say that he was 5’-17”. Maybe that was so that he would not appear to be looking down on us.
He was a constant learner and the ultimate teacher. His mind was a sponge for knowledge and once some information was in that “steel trap” it did not escape, and then he willingly shared it with anyone who would ask. Or even vaguely looked interested. All of us were awed by his knowledge on such a wide range of subjects. Today, most of us here are better at our craft because of what Rick learned and shared.
But we are not here this morning because Rick was so knowledgeable. If he had been a genius and a jerk no one would have showed up. We are here because Rick looked upon each of us as very important, whether we were or not. In his eyes everyone was valuable. And whatever he had, he wanted to share with others.
Wonder where he learned the value of a person? Could it be from the one that saw in him something valuable, someone important, when others didn’t. We owe so much to Lola, for without her we probably would not have had Rick.
He was at his best when he was teaching, whether it was in a classroom, sitting across the table at a meal, holding court at the green chair, or talking to you on the phone. Almost everyone here has a story of how the quick call to Rick turned into an hour, or more. Or how the simple question at a Letterhead gathering resulted in a history lesson, along with some chemistry, some philosophy, and a good session of building self-esteem – yours. Rick assumed that you were just as excited about some new bit of information as he was. Often, many of us wanted to say, “Rick, I didn’t want to know THAT MUCH”. But we still always jotted down a few notes so that we wouldn’t forget.
Certainly, all of us in the sign business are going to miss having that immediate and complete source of information and encouragement available to us with just a phone call. But far above that void is the lack of having Rick’s smile to greet us. I don’t remember a time when he wasn’t smiling. So many have said, “I’ve never seen him angry”. Even over the phone the voice projected a mental picture of a smiling, caring, loving person on the other end.
When you ordered something from Rick you not only got a box of supplies, but an encouraging word, a genuine concern that your project was going to turn out great, and usually some follow up call or remembrance the next time he saw you. In all of his greatness, he remained the humble teacher, always wanting you to have the spotlight and the savor of success.
Rick had a unique sense of humor. He liked to laugh. It was not unusual to be seriously listening to a long explanation of why one bathroom cup was better than the rest and then to suddenly realize that he had very gently begun to pull your leg. He looked at life a little differently than the rest of us – who here thinks Habeneros are a snack food? Or have you ever wondered if Rick owned a pair of shoes? Because we always saw him in sandals.
Time is our most prized possession. It cannot be replaced. And yet, that is what Rick gave away so freely. With every question he never seemed disturbed, annoyed, or rushed. He simply made you the center of his attention. We will probably never know how many nights he had to stay up to finish his own projects because he had used up the day helping us with ours.
For years many of us thought that we were Rick’s best friend because he treated us so special. And then we found out that he treated everyone special, whether you had been in the business for twenty years or twenty minutes. His patient was infinite. It seemed he never tired of the endless string of questions. Your question was important even if it were the most mundane and simple.
His smile always intrigued me. It was different. Along with it came a special sparkle in his eyes, and his eyebrows began to go up and his eyes just kept getting bigger. Almost like he knew something that you didn’t. And, of course, he did. It was more than just a vast array of facts and figures. He had discovered the secret that so few of us ever find – that people are more important than things. And that is what drew us to him.
You see, Rick was a preacher. He didn’t wear a collar, or a robe, or stand behind a pulpit. His life was an open book. Not one that he wrote, but one that he read…and lived. Many of us claim to believe in the “good news” but Rick was one of the few that truly allowed it to direct his life.
John 13:35 “By this all men will know that you are my disciples, if you love you another.”
We were given a glimpse of what God is like as He was revealed in how Rick treated people. All people.
Rick found assurance in the fact that this place was not his home. The short time he was here was with the knowledge that he was not designed for an existence in an imperfect world.
John 14:1ff “Do not let your hearts be troubled. Trust in God; trust also in me. In my Father’s house are many rooms; if it were not so I would have told you. I am going there to prepare a place for you. And if I go and prepare a place for you, I will come back and take you to be with me that you also may be where I am.”
Rick is not dead. He has just changed residences. Before us is the body that Rick used while he was here. But this is not Rick. He has gone home.
The Apostle John describes that place in Rev. 21 “Then I saw a new heaven and a new earth, for the first heaven and the first earth had passed away, and there was no longer any sea. I saw the Holy City, the new Jerusalem, coming down out of the heaven from God, prepared as a bride beautifully dressed for her husband. And I heard a loud voice from the throne saying, ‘Now the dwelling of God is with men, and he will live with them. They will be his people, and God himself will be with them and be their God. He will wipe every tear from their eyes. There will be no more death or mourning or crying or pain, for the old order of things has passed away.’”
Later in that chapter of Revelation John began to describe the characteristics of the city.
V. 18 “The wall was made of jasper, and the city of pure gold, as pure as glass.” V.21 “The twelve gates were twelve pearls, each gate made of a single pearl. The great street of the city was of pure gold, like transparent glass.” – Don’t you know that Rick is having a ball.
Because he believed in that place, he did not let this place overpower him. He was not angered by the petty nor did he become confused by those whose motives were selfish. His eye was on a higher standard and his goal was beyond what he could gain from others.
This was found inside the front of Rick’s Bible: “Brothers, I do not consider myself yet to have taken hold of it. But one thing I do: Forgetting what is behind and straining toward what is ahead, I press on toward the goal to win the prize for which God has called me heavenward in Christ Jesus.” Phil. 3:13-14
Today, I think Rick would be able to say the same thing that the Apostle Paul said to the young preacher Timothy in II Tim. 4:7 – “I have fought the good fight, I have finished the race, I have kept the faith. Now there is in store for me the crown of righteousness, which the Lord, the rightei9ous Judge, will award to me on that day – and not only to me, but also to all who have longed for his appearing.”
We have lost one of the greats. There is a deep void inside all of us. We are confused and there may be many “whys”. So many here have lost those that were very close, some in tragic circumstances, and yet Rick’s death has hit us especially hard. And we wonder why? Possibly it is because he was what we knew we ought to be and were not. And now he is gone and we are left.
Let us find comfort in the words from the book that guided Rick:
&Brothers, we do not want you to be ignorant about those who fall asleep, or to grieve like the rest of men, who have no hope. We believe that Jesus died and rose again and so we believe that God will bring with Jesus those who have fallen asleep in him. According to the Lord’s own word, we tell you that we who are still alive, who are left till the coming of the Lord, will certainly not precede those who have fallen asleep. For the Lord himself will come down from heaven, with a loud command, with the voice of the archangel and with the trumpet call of God, and the dead in Christ will rise first. After that, we who are still alive and are left will be caught up together with them in clouds to meet the Lord in the air. And so we will be with the Lord forever. Therefore, encourage each other with these words.” I Thess. 4:13-18
To the family and especially to Rick’s special friend, Lola, all of us here wish that we could say the words that would make the hurt go away. We have come here today from all over the United States, Canada, and even from England because of our deep respect for Rick, but also because no one could think of Rick without thinking of Lola. We extend to you our love and our hearts, along with all the hugs that we can get in, in order that you may know how we loved both you and Rick. There are a lot of people all over the world right now that are reaching out to you to offer comfort. I received many calls this past week with people saying, “Please give Lola a hug for me and tell her that we love her.”
Today, many are closing their businesses and setting aside this time as a memorial to you and Rick. Our sympathy surrounds you as our hearts are torn with yours. May God bless you.
Prayer.
![]()
WOW! This is fabulous, Mike!. Thank you for compiling all of this information AND honoring Rick this way. He was definitely the “Daddy” of keeping the craft alive. What a beautiful way to honor his legacy.
Most valuable man, most valuable information.
I wish I could have known him in person.
Still worth a regular visit to read about ricks methods
Thanks for keeping it all available